Sign In
Upload
Manuals
Brands
GE Manuals
Measuring Instruments
SCOUT100-Ex
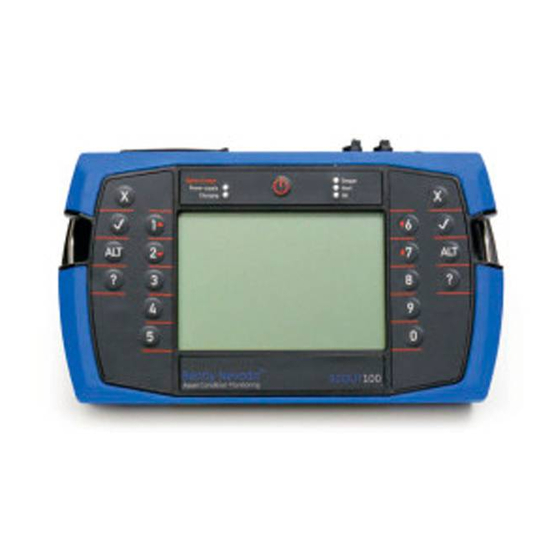
User Manuals: GE SCOUT100-Ex Vibration Data Collector
Manuals and User Guides for GE SCOUT100-Ex Vibration Data Collector. We have
1
GE SCOUT100-Ex Vibration Data Collector manual available for free PDF download: Reference Manual
GE SCOUT100-Ex Reference Manual (282 pages)
Brand:
GE
| Category:
Measuring Instruments
| Size: 5.08 MB
Table of Contents
Table of Contents
4
Section 1 - Introduction
12
Flex Features
13
Precautions
15
Hazardous Locations
17
CSA Certification - Vbseries Instruments
17
Iecex / ATEX Certification - SCOUT Instruments
19
Instrument Connections
22
Front Panel Buttons
23
Led Indicators
24
Charge Battery Pack
25
Battery Features
26
Remove Battery Pack
27
Cable Test
28
Operating Overview
29
Onsite Analysis
30
Recording Routes
31
Balancing
32
Keypad Entry
33
Section 2 - Instrument Fundamentals
34
Switch Instrument on or off
34
Use Main Menu
35
Return to Previous Menu
35
Use Navigation Keys and Icons
35
Select Menu Items
37
Select Option
37
Jump to End of List
37
Scroll through Multi-Column List
38
Cancel Option
38
Display Hint Labels and Detailed Help
39
Display Alternative Options
41
Enter Characters
42
Example - Rename Folder
43
Additional Icons
45
Section 3 - Sensors
46
Connect Sensor to Instrument
46
Mount Sensor
46
Set up Accelerometer
47
Permanent Mounting
48
Set up Tachometer
49
Tachometer Signal from Keyphasor
51
Manual Keyphasor Threshold Settings
53
Use Strobe Light
56
Section 4 - Measurement Types and Their Uses
57
Spectrum
57
Strobe Output
59
Read Speed of Connected Strobe
61
Waveform
62
Demodulation
63
Analyze Demodulation Data
65
Demod Spectrum
66
Ack
66
Streamlined Parameter Settings
67
6Pack Demodulation Processing
68
Tachometer Display
69
Time Synchronous Averaging
70
Bump Test
71
Coast-Down/Run-Up
72
Tips for Coast-Down/Run-Up Recordings
72
Deactivate Saving Waveform Data for Coast-Down/Run-Up Measurement
73
Take Coast-Down/Run-Up Measurement
74
Cross Channel Phase
75
Cros Channel Phase
75
Recommendations for Cross Channel Phase
76
Fault Types and Their Phase Relationships
77
Measuring Cross Channel Phase
80
Setup
80
Measure Cross Channel Phase
81
Plan Cross Channel Spectrum (ODS) Recording Routine
82
Setup
83
Take Cross Channel Spectrum (ODS) Recording
86
Review Data
88
Review Data in Ods Software
89
Long Time Waveforms
91
Measure Long Time Waveforms
91
View Long Time Waveforms on Computer
93
Orbit Plot
94
Use Orbit Plot Measurement Mode
97
Take Orbit Plot Measurement on Route
99
Modal Impact Testing
100
Plan Impact Test Routine
101
Setup
101
Perform Trial Impact
104
Disable Warning Messages
106
Perform Actual Modal Impact Test
106
Specify Locations and Directions for Saved Impacts
108
Review Data
109
Keypad Entry
110
Order Tracking
112
Take Order Tracked Measurement
113
Average Value Measurements
117
Take Multi-Channel Simultaneous Measurements
117
Set up Sensors and Channels
118
Save Multi-Channel Measurements
119
Section 5 - Set Measurement Options
121
Set Measurement Units and Spectrum Scaling
121
Set Measurement Parameters
123
Create Your Own Parameter Sets
125
Assign Sensors to Channels
126
Spectrum Parameters
127
Fmax
128
Spectral Lines
129
Fmin
129
Tach Trigger
129
Averaging
129
Number of Averages
130
Averaging Types
130
Average Overlap
130
Windowing
131
Choose Window Type
131
Waveform Parameters
131
Equivalent Fmax
132
Number of Samples
132
Duration
132
Additional Measurement Parameters
132
Section 6 - Take Recordings
133
Walkthrough - Take Recordings
133
Take Individual and Multiple Recordings
134
Individual Recording
134
Multiple Recording
134
Save Recordings
135
Review Recording
136
Review Current Recording
136
Review Stored Recording
137
Delete Recording
138
Attach Note
138
Baseline Recordings
139
Section 7 - Analyzing Measurements Onsite
140
Tips for Taking Measurements
141
Walkthrough - Take Measurement
142
Change Default Measurement Settings
144
Charts
145
Analyze Measurements
146
Cursors
147
Show or Hide Harmonics
149
Zoom
150
View Multiple Charts
151
Select Chart
151
Display Single Chart
151
Change Chart View
152
Select Chart Layout
152
Change Multi-Chart Layout Display
152
Sety Axis (Amplitude ) Scale
153
Fixed y Axis Scale Options
154
Amplitude Display Units
155
Unit
155
Adb
156
Vdb
156
Set Rpm
156
Enter RPM Manually
156
Enter RPM Using 1X Peak
157
View Orders
158
View Revolutions
159
Save Measurement
159
Save to Existing Machine
160
Save to New Machine
161
Change Screen Contrast While in Measure Mode
162
Section 8 - Send and Receive Information
163
Transfer Recordings from Instrument to Ascent
163
Transfer Folders from Ascent to Instrument
165
Resend Updated Folder
166
Retain Stored Recordings
166
Retain Baseline Recordings on Instrument
166
Synchronize Time Zone on Instrument and Computer
167
Export or Import Data Using Usb Flash Drive
168
Export Data Using USB Flash Drive
169
Import Data Using USB Flash Drive
170
Remote Comms Functionality
170
Receive Data from Remote Comms Server
171
Send Data from Instrument to Remote Comms Server
172
Connect to Wi-Fi Network
173
Set up Wireless Network
174
Connect Instrument to Wireless Network
176
Specify Preferred Wireless Connection
177
Using Wi-Fi with Your Smart Phone
178
Uff Export
179
Section 9 - Working with Routes
180
What Is a Route
180
Walkthrough - Take Recordings Using Route
181
Use Band Alarms and Baseline Overalls on Route
184
View Alarm Bands Configured in Ascent
186
Record Multiple Channels on Route
187
Axis Mode
188
Point Mode
189
Complete Setup
190
Triaxial Measurements
190
Enter Machine Speed on Route
193
View Machine and Point Speed Details
195
Skip Route Entries and Machines
195
Locate Skipped Route Entries
196
Track Progress through Route
197
Save Route Recording
198
Select Save Mode for Recording
199
Select Recording to Review
200
Retake Recording
201
Delete Route Recording
202
Take Off-Route Recording
203
Edit or Delete Route
203
Section 10 - Create, Edit, and Delete Items
204
Storage Capacity and Recording Volume
204
Organize and Store Recordings
205
Folders
207
Create Folder
207
Change Selected Folder
207
Rename Folder
207
Delete Folder
208
Restore Deleted or Overwritten Folder
208
Machines
209
Create Machine Structure
210
Create Parameter Set
211
Change Sensor
212
Add Structure to Existing Machine
212
Copy Machine Structure
213
Rename Machine Structure
214
Delete Machine Structure
215
Sensors
216
Define or Edit Sensors
216
Bias Voltage Check
218
Set Default Sensor
219
Change Sensor Temporarily
220
Change Default Sensor
220
Delete Sensor
220
Notes
220
Create Note
221
Edit Note
221
Attach Note
222
View Note
222
Detach Note
222
Delete Note Permanently
223
Delete All Recordings in Folder
223
Delete All Stored Information
224
Section 11 - Balancing Rotors
225
Methods for Balancing Rotors
225
Balancing Process
226
Balancing Tips
227
Tachometer
227
Suggested Trial Weight Mass and Location
228
Manually Enter Balancing Data
228
Set up Balancing Job
229
Balance Planes and Weight Positions
230
Balance Planes
230
Weight Position (Reference Mark)
230
Sensors
232
Channel Position
233
Averages
234
Machine Information
235
Rotor Weight, Diameter, and Speed
235
Reference Mark
236
Filter Bandwidth
237
Weight Orientation
237
Tach Trigger
238
Weight Lin Dist
238
Store Units
238
Combine and Split Trim Weights
238
Combine/Adjust Weights
239
Split Weight
240
Adjust Weights for New Radius Location
242
Review Previous Balancing Jobs
243
Section 12 - Balancing Walkthrough
244
Step 1 - Set up New Balance Job
245
Step 2 - Take Initial Reading
246
Step 3 - Take Trial Reading
248
Step 4 - Balance Rotor
251
Step 5 - Perform Trim Balancing
252
Step 6 - View or Save Balancing Job
253
Save Balance Job
254
Section 13 - General Setup Options
255
Set Date and Time
255
Adjust Date or Time Format
256
Select Local Time Zone
256
Daylight Saving Automatic Adjustment
257
Adjust Sound Volume
258
Set Instrument Language
258
Adjust Screen Contrast
258
Switch Backlight On/Off
259
Estimate Remaining Operating Time
259
Conserve Battery Power
260
Set Backlight Timeout
260
Set Sleep Mode Timeout
261
Change Default Sleep Mode Timeout
261
Switch Instrument on
261
Set Complete Powerdown Timeout
262
Manage Instrument Memory
262
Check Available Memory
263
Instrument Memory Warnings
263
80% Memory Capacity Warning
264
95% Memory Capacity Warning
265
Free up Instrument Memory
266
Reformat Memory Card
267
Empty Recycle bin
268
Overwrite Primary Database with Mirror Backup
269
Display System Information
270
Unlockable Features
271
Upgrade Instrument Firmware - Proflash
272
Proflash Procedure
273
Section 14 - Troubleshooting
274
Reset Instrument
274
Troubleshoot Network Communications
275
Set Ethernet Network Address
276
Reset Network Values to Factory Default
276
Ethernet Connection Lost in Windows Vista
277
Index
278
Advertisement
Advertisement
Related Products
GE SCOUT140-Ex
GE SimpliNano
GE AquaTrans ST600
GE Sievers 900 Series
GE StressTel T-MIKE E
GE Centricity SP1001
GE SS-131ER
GE SEER 1000
GE Profile SCB 1000 CC
GE SCB1001MSS
GE Categories
Refrigerator
Ranges
Microwave Oven
Air Conditioner
Dishwasher
More GE Manuals
Login
Sign In
OR
Sign in with Facebook
Sign in with Google
Upload manual
Upload from disk
Upload from URL