Advertisement
Quick Links
Advertisement

Summary of Contents for D-Link DVG-7111S
- Page 1 DVG-7111S VoIP Telephone Adapter User’s Manual Version 1.0 (21 Feb. 2014)
- Page 2 Preface D-Link reserves the right to revise this publication and to make changes in the content hereof without obligation to notify any person or organization of such revisions or changes. Trademarks D-Link and the D-Link logo are trademarks or registered trademarks of D-Link Corporation or its subsidiaries in the United States or other countries.
- Page 3 Contents 1. Introduction ................................ 4 1-1 Product Overview ............................4 1-2 Hardware Description ..........................5 2. Getting Started ..............................7 3. VoIP TA Web Configuration ..........................14 3-1 SETUP ..............................17 3-1-1 Internet Setup ..........................17 3-1-2 VoIP Setup ............................. 21 3-1-3 LAN Settings ..........................
- Page 4 VoIP TA allows you to use voice and fax services over IP in order to reduce the cost of all long distance calls. The DVG-7111S can be configured a fixed IP address or it can have one dynamically assigned by DHCP or PPPoE. It adopts either the G.711, G.726, G.729A or G.723.1 voice compression format to save network bandwidth while providing real-time, toll quality voice transmission and reception.
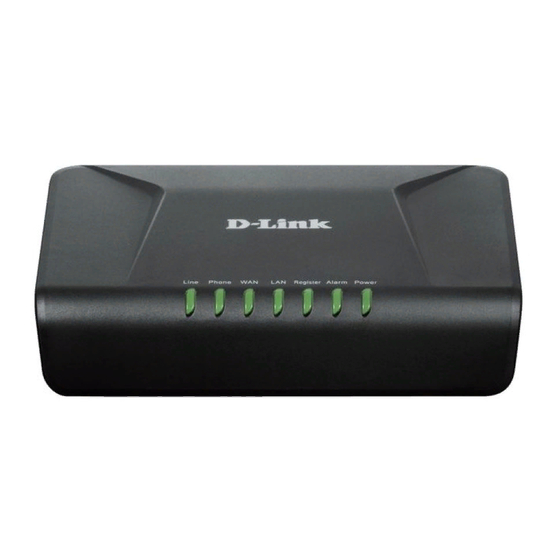
- Page 5 Line Indicator: Line LED light on means FXO/PSTN line is in use (off-hook). Note: When starting up DVG-7111S, all indicators will light up. After about 40 seconds, the Reg. indicator will blink in green. If the Prov./Alm indicator continues to blink, it means DVG-7111S is currently communicating with ISP and has yet to obtain an IP address or fail to register to VoIP Service Provider.
- Page 6 DVG-7111S User’s Manual Telephone Interface Description Rear Panel Line: Connect to your original telephone line on the wall jack with RJ-11 cable. Phone Port: Connect to your phones using standard phone cabling (RJ-11). WAN: Connect to your broadband modem using an Ethernet cable.
- Page 7 DVG-7111S User’s Manual SETUP 2. Getting Started To access the web-based configuration utility, open a web browser such as Internet Explorer and enter the IP address of the DVG-7111S. Open your Web browser and type http://192.168.8.254 into the URL address box.
- Page 8 DVG-7111S User’s Manual SETUP Click Setup Wizard. Click Next D-Link Systems, Inc.
- Page 9 DVG-7111S User’s Manual SETUP The username of ADMIN and USER have been defined and locked by default. It is highly recommended to create a login password to keep your router secure. Click Next. D-Link Systems, Inc.
- Page 10 DVG-7111S User’s Manual SETUP Enter a NTP server or use the default server. Click Next. D-Link Systems, Inc.
- Page 11 DVG-7111S User’s Manual SETUP Select your Internet connection type: DHCP – Most Cable ISPs or if you are connecting the DVG-7111S behind a router. Static IP – Select if your ISP supplied you with your IP settings. PPPoE – Most DSL ISPs.
- Page 12 DVG-7111S User’s Manual SETUP Register to the SIP Proxy Server by clicking Enable support of SIP Proxy Server. Enter Proxy Server IP/Domain and Port. Outbound Proxy Support is optional. To register, please click on the Outbound Proxy Support box and enter Outbound Proxy IP/Domain and Port in it.
- Page 13 DVG-7111S User’s Manual SETUP Setup is finished. Check the summary of your settings. To make new settings effective, you must click on the Restart button to reboot the DVG-7111S. Click Restart D-Link Systems, Inc.
- Page 14 DVG-7111S User’s Manual SETUP 3. VoIP TA Web Configuration During configuration, please follow the Setup Hint for some specific procedure in case the VoIP TA fails to make the changes active. Situation 1: (example: Internet Setup) Setup Hint: Select DHCP WAN Setup.
- Page 15 DVG-7111S User’s Manual SETUP Situation 2: (example: VoIP Service Provider) Setup Hint: Click “Edit” to start configuration. Click “Apply” after settings. Go to “MAINTAINACE”-> “Backup and Restore” save settings and reboot the system. D-Link Systems, Inc.
- Page 16 DVG-7111S User’s Manual SETUP Situation 3: (example: Enable IP Filtering) Setup Hint: Click “Enable IP Filtering” check box to open the main screen. Click “Add” to enter an entry. After Adding an entry, you have to click “Apply”. Don’t forget to click “Apply” which in the filed of “Enable IP Filtering”.
- Page 17 DVG-7111S User’s Manual SETUP 3-1 SETUP 3-1-1 Internet Setup WAN (Wide Area Network) Settings are used to connect to your ISP (Internet Service Provider). The WAN settings are provided to you by your ISP and oftentimes referred to as "public settings". Please select the appropriate option for your specific ISP.
- Page 18 DVG-7111S User’s Manual SETUP SETUP → Internet Setup SETUP → Internet Setup DHCP: Select this option if your ISP (Internet Service Provider) provides you an IP address automatically. Cable modem providers typically use dynamic assignment of IP Address. The Host Name field and Vendor Class ID are optional but may be required by some Internet Service Providers.
- Page 19 DVG-7111S User’s Manual SETUP SETUP → Internet Setup PPPoE: Select this option if your ISP requires you to use a PPPoE (Point-to-Point Protocol over Ethernet) connection. Enter the PPPoE Account, PPPoE Password and re-enter Password to confirm. SETUP → Internet Setup PPTP: Point-to-Point Tunneling Protocol (PPTP) is a WAN connection.
- Page 20 DVG-7111S User’s Manual SETUP SETUP → Internet Setup WAN Link Speed: Select WAN port link speed. SETUP → Internet Setup VoIP Connection Interface: Select a WAN interface for DVG-N5412SP VoIP traffic. SETUP → Internet Setup Factory Default MAC Address: The original MAC address of the VoIP Router.


