Advertisement
USING THE AIR
CONSUMER SUPPORT
Warranty . . . . . . . . . . . . . . . . . . . . . . . . . . . . 19
Consumer Support . . . . . . . . . . . . . . . . . . . 20
Write the model and serial
numbers here:
Model # _________________
Serial # _________________
You can find the this information
on a label attached to the right
side of the chassis.
GE is a trademark of the General Electric Company. Manufactured under trademark license.
. . . . . . . . .3
. . . . . . . . . . . . . . 4
. . . . . . . . . . .7
. . . . . . . . . . . . . . . 8
. . . . . . 17
OWNER'S MANUAL &
INSTALLATION
INSTRUCTIONS
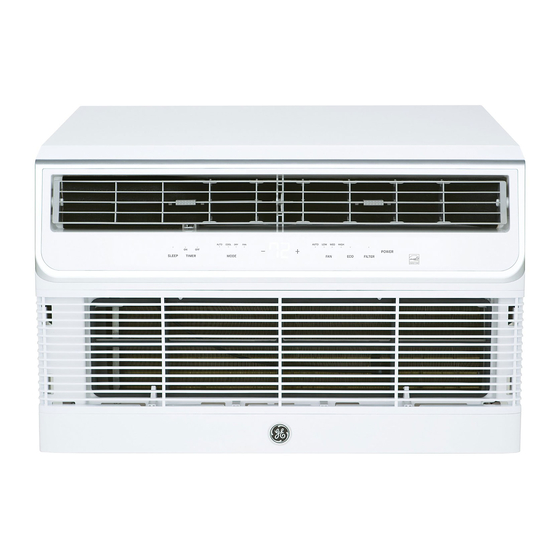
Cool Only Models
AJCQ06LCH
AJCQ08ACH
AJCQ10ACH
AJCQ10DCH
AJCQ12ACH
AJCQ12DCH
AJCQ14DCH
Cool Only High Mount Models
AJCM10ACH
AJCM10DCM
AJCM12DCM
Heat/Cool Models
AJEQ08ACH
AJEQ10DCH
AJEQ12DCH
AJEQ14DCH
Heat/Cool High Mount Models
AJEM12DCH
Heatpump Models
AJHQ08ACH
AJHQ12DCH
ESPAÑOL
For a Spanish version of this
manual, visit our Website at
www.GEAppliances.com.
Para consultar una version
en español de este manual
de instrucciones, visite nuestro
sitio de internet
www.GEAppliances.com.
FRANÇAIS
For a French version of this
manual, visit our Website at
www.GEAppliances.ca.
Pour un version français de
ce manuel d'utilisation, veuillez
visiter notre site web à l'adresse
www.GEAppliances.ca.
49-5000492 Rev. 0 03-20 GEA
Advertisement

Summary of Contents for GE AJCQ06LCH
-
Page 1: Table Of Contents
You can find the this information visiter notre site web à l’adresse on a label attached to the right www.GEAppliances.ca. side of the chassis. GE is a trademark of the General Electric Company. Manufactured under trademark license. 49-5000492 Rev. 0 03-20 GEA... - Page 2 THANK YOU FOR MAKING GE APPLIANCES A PART OF YOUR HOME. Whether you grew up with GE Appliances, or this is your first, we’re happy to have you in the family. We take pride in the craftsmanship, innovation and design that goes into every GE Appliances product, and we think you will too.
-
Page 3: Safety Information
IMPORTANT SAFETY INFORMATION READ ALL INSTRUCTIONS BEFORE USING THE APPLIANCE For your safety, the information in this manual must be followed to minimize the risk of WARNING fire, electric shock or personal injury. described in this Owner’s Manual. Turn the unit OFF and unplug your air conditioner This air conditioner must be properly installed in accordance before cleaning. - Page 4 Using the Air Conditioner - Controls Appearance may vary. AUTO HIGH HEAT AUTO COOL POWER SLEEP TIMER MODE FILTER Air Conditioner Controls • Lights below the touch pads on the control panel indicate the selected settings 1. POWER 6. Timer Turns air conditioner on and off.
- Page 5 Using the Air Conditioner - Features To Adjust Fan Speeds Press the Fan Speed button to select the FAN Speed For some models, the fan speed can not be adjusted in four steps - Auto, Low, Med, or High. Each time the under HEAT mode.
- Page 6 To properly connect the wiring from a remote wall (heatpump models only) thermostat, follow these steps: Green Fan High 1. Order the 8-pin connector from GE Appliances Service. Fan low Call 1-800-626-2002 and order WP26X24981. A 24 VAC connector is required for each unit being controlled by a wall thermostat 2.
-
Page 7: Care And Cleaning
• If they are clogged with dirt or soot, they may need to should be checked regularly. be professionally cleaned, a service available through GE Appliances service or other service companies. How to Insert the Batteries in the Remote Control 1. Remove the battery cover by rotating it to the unlock NOTES: position. -
Page 8: Installation Instructions
Installation Instructions For more help, visit GEAppliances.com IMPORTANT NOTE BEFORE YOU BEGIN For optimal energy efficiency and performance, we Read these instructions completely and carefully. recommend using the RAB26 or the RAB46B wall sleeves with the RAG13A rear grille. IMPORTANT – •... - Page 9 Installation Instructions Security Brackets Installation (It is important to install these brackets to prevent the chassis from being pushed into the room from the outside.) The brackets must be installed so the flanges are hooked behind the inside flanges of the wall sleeve. the sides of the chassis.
-
Page 10: Troubleshooting Tips
Troubleshooting Tips... Before you call for service Problem Solution Air conditioner does Wall plug disconnected. Push plug firmly into wall outlet. not start House fuse blown or circuit breaker tripped. Replace fuse with time delay type or reset circuit breaker. Plug current device tripped. -
Page 11: Warranty
For The Period Of: GE Appliances Will Replace: Two Years GE Appliances Will Replace: Any part of the air conditioner which fails due to a defect in materials or workmanship. During this limited two-year warranty, GE Appliances will also From the date of the provide, free of charge, all labor and related service to replace the defective part. -
Page 12: Consumer Support
Have a question or need assistance with your appliance? Try the GE Appliances Website 24 hours a day, any day of the year! You can also shop for more great GE Appliances products and take advantage of all our on-line support GEAppliances.com...


